Ultrasonic NDT
Inspection of Composite Structures
Published on 4th January 2021

There is a limit to the strength of composite sheet after which stiffeners are required to make cost effective stronger assemblies. The stiffeners are often constructed from different materials and are connected to the sheet using an adhesive. The integrity of the connection is vital to ensure the strength of the structure. Inspection is a critical process in ensuring the integrity.
The manufacturing processes must be carried out and verified under strict inspection and testing guidelines. Ultrasonic inspection is a proven method to provide the necessary assurance.
With advances in composite design and manufacturing to satisfy new applications, complex geometries are often required. Ultrasonic equipment and application processes has also advanced and become more sophisticated to resolve the difficult access problems and complex inspection requirements.
This application note identifies the hardware and software solutions to help overcome such inspection challenges.
RSflite, Probe & UTmap
General Inspection Techniques
The more layers within a composite the higher the risk of surface or internal defects occurring during manufacture.
Pulse echo monitoring and through transmission (twin probe pitch and catch) are currently the most common NDT methods for such applications.
The pitch-catch technique identifies dis-bonding while the pulse-echo technique targets resin pool, de-lamination and fibre excess. In many applications it is not possible to access both sides of the component and/or complex geometry restricts direct access. In these circumstances innovative methods and equipment are required.
Fig. 1 - Composite stiffener
Inspection of Stringer connections
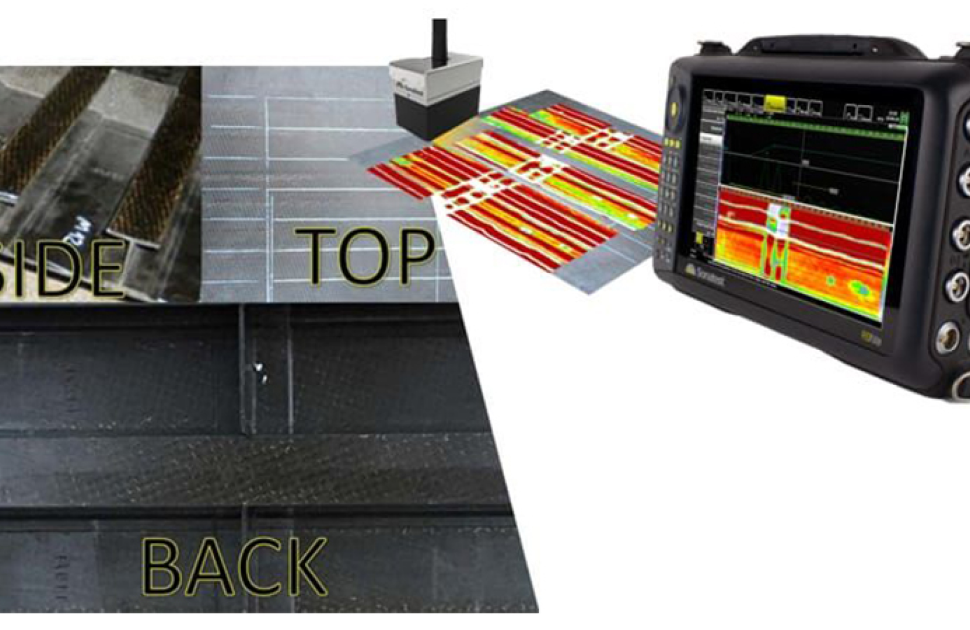
Graphite-epoxy stringers are used to increase the stiffness of the composite sheet. They are glued to the composite and the integrity of the connection has to be inspected. The entire top surface is mapped using a linear phased array probe such as the X3A with a soft rubber glider which ensures that the probe moves smoothly across the surface. The pulse-echo method is used.
The A-Scan will show if the stiffener is not bonded to the composite. The use of RS Flite with a wheelprobe provides exceptionally fast inspection and data acquisition.
C-Scans are created and can be stitched together utilising UT Map software to create a full map of the component.
UTmap software
Typical Composite Flaw
The combination of RSflite unit and UTmap software provide full visualisation allowing accurate analysis and the subsequent report is comprehensive and created automatically. Importantly, UTmap can automatically highlight flaws based on the amplitude and the time-of-flight distance with pre-defined rejection criteria.
With customised annotation boxes, the defect criteria and geometrical properties are exported to CSV data files along with a full PDF report as required with a click of a button.
Industries
- Aerospace
- Automotive
- Marine
Typical Parts
- Aircraft parts
- Reinforced composite structures
- Bonded joints
Inspection Techniques
- C-scans in amplitude and depth
- Back-wall signal monitoring
- Phased array
Features & Benefits
- 2D, high-resolution scans
- Large recording scale capabilities
- Data-to-photo visualisation
- Typical identification of structural defects (dis-bound, void, inclusion & resin pool)
Recommended Package
- RSflite/Veo+
- UTmap/UTstudio+
- X3A-003 (5M64E)
- 3AG-0L25 (glider wedge)
- Axis/Odi
- X6A-004 (5M128)
- X6AW-0L25-IHC wedge
- WP2 5MHz, Wheel Probe composite kit
For further information or support, please contact the Sonatest Applications Team: applications@sonatest.com
Source: https://sonatest.com/resources/application-notes/inspection-composite-structures


