Terahertz Engineering Services PVT. LTD.
TERAHERTZ provides all kind of NDT related services & consultancy
Product, Service
India
Overview
M/s. Terahertz Engineering Services Pvt. Ltd. is founded to stand apart with the distinction of being the only company in India to usher in sophisticated techniques to improve quality of engineering services in India.
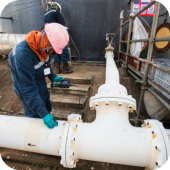
Terahertz is founded in Gujarat – an industrial state - in the year of 2021 and started up with providing technologically most advanced Non-Destructive Testing services to diverse industrial sectors such as cross-country pipelines, defence, refineries, power plants, aerospace etc.
Founded by first generation entrepreneurs with a vision to emerge as the leader in engineering services, Terahertz Engineering Services is committed to provide advanced technological solutions related to NDT in the most efficient manner to lead timely completion of projects.
We provide various NDT solutions and services such as Radiographic Testing, Ultrasonic Flaw Detection, Ultrasonic Thickness Testing, Magnetic Particle Inspection and Liquid Penetrant Testing to our clients. It has highly qualified and certified NDT Engineers trained under the guidance of BARC, AERB, ASNT, ISNT and PCN who are constantly researching to improve techniques and to adopt latest technological advancements to provide world-class services to Indian industries.
Products & Services
Radiographic/X-Ray Testing (RT)
Radiographic Testing (RT) is a non-destructive testing (NDT) method which uses either x-rays or gamma rays to examine the internal structure of manufactured components identifying any flaws or defects. In Radiography Testing the test-part is placed between the radiation source and film (or detector). The material density and thickness differences of the test-part will attenuate (i.e. reduce) the penetrating radiation through interaction processes involving scattering and/or absorption. The differences in absorption are then recorded on film(s) or through an electronic means. In industrial radiography there are several imaging methods available, techniques to display the final image, i.e. Film Radiography, Real Time Radiography (RTR), Computed Tomography (CT), Digital Radiography (DR), and Computed Radiography (CR).
Ultrasonic Testing (UT)
Manual Ultrasonic Testing (UT) one of the more common non-destructive testing methods performed on materials. This testing utilises high frequency mechanical energy, i.e. high frequency sound waves, to conduct examinations and measurements on a test area. Typically the UT inspection system consists of a ultrasonic transducer, pulser/receiver, and display unit. A pulser/receiver is an electronic device that can produce high voltage electrical pulses to the transducer. When driven by the pulser, the transducer generates high frequency ultrasonic sound energy into the material in the form of sound waves. When there are discontinuities such as inclusions, porosity, cracks, etc. in the sound path, part of the mechanical energy will be reflected from the discontinuities' (reflectors') surface. The reflected sound waves signal received by the transducer is then transformed back into an electrical signal and its intensity is shown on the display unit. The sound waves travel time can be directly related to the distance that the signal has travelled. From the signal, information about reflector location, size, orientation and other features can be determined.
Magnetic Particle Testing (MT)
This method is used for the detection of surface and near-surface flaws in ferromagnetic materials and is primarily used for crack detection. The specimen is magnetised either locally or overall, and if the material is sound the magnetic flux is predominantly inside the material. If, however, there is a surface-breaking flaw, the magnetic field is distorted, causing local magnetic flux leakage around the flaw. This leakage flux is displayed by covering the surface with very fine iron particles applied either dry or suspended in a liquid. The particles accumulate at the regions of flux leakage, producing a build-up which can be seen visually even when the crack opening is very narrow. Thus, a crack is indicated as a line of iron powder particles on the surface. The method is applicable to all metals which can be strongly magnetised – ferritic steels and irons, but not generally austenitic steels. The method of magnetisation must produce a magnetic field with lines of force at a large angle to the expected direction of the cracks to be detected, so that it is usual to apply the magnetisation more than once in different directions, for example in two directions mutually at right-angles, but methods of swinging the field direction during magnetisation are available.
Ads