Back to Companies

Golden Inspection Company

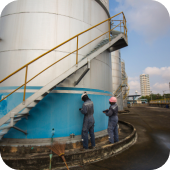
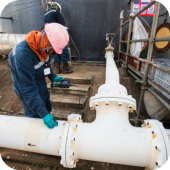
Golden inspection company for NDE (RT-PT-UT-MT-VT), we have experience in pipelines, Tanks, power plant, Fertilizers Company, Oil and gas

Service

Egypt

Visit Website
Overview

GoldenInspection Co. is owned and managed by a highly qualified and internationally recognized group of Engineers, who have long proven record of experience in the fields of Refinery, Oil and gas production (onshore/offshore), Petrochemical plants, Fertilizers, Power Plants, Cement, Steel and Sugar Mills.

Products & Services
Visual Testing

It is relatively easy and low in demand. The equipment is used just for inspection of close or direct inaccessible areas, such as tanks, tubes and vessels. In some qualification systems, this method is not recognized as regular NDT, because it is a “natural” activity. However, the great benefit is transparency and understandable reported information. We can measure defect dimensions. Data storage is simple via photo.

VT can be applied everywhere, including objects with elevated temperature (it is contactless) or risk of explosion (direct observation without any appliance). Potential users are weld workshops, assembly workplaces, and inspectors with high productivity demands. Knowledge is useful also for engineers, who “need to look” at the objects.

Liquid Penetrant Testing

It’s simply improving VT reliability in specific applications. Although this is classified as a surface method, we can distinguish between scratch and crack. Sensitivity increases, which means better resolution with more susceptible conditions. Only open-to-surface defects can be detected, good cleaning is necessary. We report just an indication; that the real source stays uncertain (it is a common feature of every method except VT).

PT can be applied to smooth, clean surfaces. The productivity of PT lines is impressive: a batch of small objects can be processed at once. Using the fluorescent technique, the indication “shines” and is visible. It’s the only method e.g. chromium layer integrity investigation. A manual technique of cans (sprays) is very popular in the course of in-service inspections – detection of flaws and fatigue cracks.

Ultrasonic Testing

Together with radiography, it is classified as a volume method. It means that even defects inside the material can be detected. A little bit tricky application, as the probe can be applied on the object-accessible surface only. A typical application is a task of material integrity approval, e.g. manufactured semi-products (sheet, forging or casting) or welds.

Internal reflections can be applied in advance. A lot of techniques have been developed, such as pulse-echo, transmission-through, and Time-Of-Flight-Diffraction. We need “to see” a defect in a specific direction range, however, its distance (depth under the surface) may be very long (a success of 12 meters in concrete was published). On the other hand, separated layers of CFRP composite can be recognised – it means a resolution of about 0.1 mm. 

OnestopNDT
OnestopNDT OnestopNDT OnestopNDT
OnestopNDT

Step 1 - please enter your Personal details.

Step 2 - please upload your Resume.

Thank you for submitting.

Tree PNG back

Companies

Tree PNG back

Articles

Webinars

Webinars

Tree PNG back

Jobs

Application Notes

News