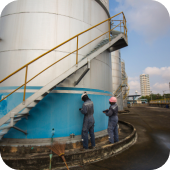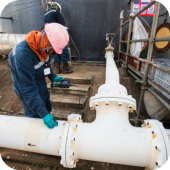
ALS Asset Integrity & Reliability
ALS has provided comprehensive testing solutions to clients in a wide range of industries all over the world.
Service
Australia
Overview
A global leader in testing
For more than 40 years, ALS has provided comprehensive testing solutions to clients in a wide range of industries all over the world. Our adoption of state-of-the-art technology and innovative methodologies – coupled with the strength of our international teams – ensure that we deliver the highest quality services using local expertise and personalized solutions.
Products & Services
Asset integrity & reliability
Non destructive testing (NDT)
Our Conventional NDT solutions ensure every client receives a safe, reliable and accurate inspection, and ultimately achieves absolute confidence in their asset's condition. From access solutions to radiographic inspections, our technicians are trained to provide the best inspection services across a wide range of applications.
EDDY CURRENT TESTING
Eddy Current testing exposes surface and sub-surface defects whilst leaving surface coatings intact.
Eddy Current testing is an electromagnetic induction technique that used across industries for detecting surface defects in carbon and low alloy steels, and surface, near-surface and sub-surface defects in non-ferritic materials such as brass, copper, aluminium and stainless steel.
The use of induction allows Eddy Currents to be created even if the material has paint coatings in place.
Surface Eddy Current Testing
Using handheld probes, Surface Eddy Current testing uses electromagnetic induction to detect discontinuities. Surface testing does not require contact between the probes and metallic parts and in ideal situations, can detect defects as small as 1mm in length.
Defects can be detected through various non-conductive surface coatings, eliminating the need to remove coatings such as paint.
Other advantages include:
- Customised probes can be used for complex geometries requiring inspection.
- Eddy Current testing poses no danger to the surrounding environment.
- Testing equipment is extremely portable.
- Results are immediate.
- Detection of sub-surface defects in non-magnetic materials may also be possible.
Applications for Surface Eddy Current testing include:
- Painted structures, piping, vessels and tanks
- Cranes, both fixed and mobile
- Road tankers
Other advantages include:
- Customised probes can be used for complex geometries requiring inspection.
- Eddy Current testing poses no danger to the surrounding environment.
- Testing equipment is extremely portable.
- Results are immediate.
- Detection of sub-surface defects in non-magnetic materials may also be possible.
Other related services
ALS has significant expertise executing Surface Eddy Current testing and carefully interpreting the results. To explore advanced Eddy Current testing techniques, such as Pulsed Eddy Current testing (PEC) and Saturated Low Frequency Eddy Current (SLOFEC), visit Advanced NDT.
MAGNETIC PARTICLE INSPECTION
Magnetic Particle Inspection, when performed by ALS technicians, has the powerful ability to detect discontinuity in ferromagnetic materials.
Magnetic particle inspection is a non-destructive testing technique that pinpoints surface and near-surface discontinuities in ferromagnetic materials. It is the process of examining for features, such as cracks and welds, by using magnetic particles which are drawn to the surface defects by a magnetic field. The inspection process takes advantage of the fact that magnetically susceptible materials are attracted to magnetic fields.
Magnetic particle inspection can be used to detect a number of different types of surface and near surface discontinuities. It can be performed on raw materials, finished or semi-finished materials such as:
- Cast, rolled and forged products
- Billets
- Welds
- In-service assembled or disassembled products
Advantages of Magnetic Particle Inspection
The advantages to magnetic particle inspection include:
- It is a reliable and highly sensitive test method.
- It is relatively fast and simple.
- It has little limitation on size and shape of the asset being inspected.
- Set up costs are minimal.\
- The asset does not require the stringent cleaning needed for Penetrant Testing, as the defect can still be detected if contaminated.
The ALS Approach
ALS’s highly experienced technicians are across these limitations and are trained to identify, avoid and overcome these boundaries if they occur. When magnetic particle inspection is the best non-destructive testing option, our technicians are able to efficiently and accurately execute the testing.
PENETRANT TESTING
Penetrant testing is a non-destructive testing method used to detect discontinuities open to the testing surface which includes, but is not limited to, cracks, porosity, pipes, seams, forging laps and fusion defects. It is suitable for use on a wide variety of non-absorbent materials such as metals, ceramics and plastics however, porous or overly rough materials are generally unsuitable for penetrant testing.
Penetrant testing is achieved by applying a penetrant liquid to the test specimen’s surface. This liquid is drawn into any surface breaking discontinuity by Capillary Action. After a suitable amount of time, the excess penetrant is removed from the inspection surface and a finely divided developer powder is applied. The developer draws residual penetrant from surface discontinuities thereby providing a visual indication of the discontinuity’s location.
Advantages of penetrant testing
Penetrant testing is a highly sensitive, non-destructive method that has incredible capacity for detecting extremely fine flaws and the smallest surface discontinuities. Penetrant testing also has the ability to inspect small objects even if awkwardly shaped, allowing them to be batch tested for improved efficiency.
Discontinuities capable of detection by penetrant testing include:
- Rolled products: cracks, seams and surface laminations.
- Castings: cold shuts, hot tears, porosity, blowholes and shrinkage defects.
- Forgings: cracks, laps and surface bursts.
- Welds: cracks, surface porosity, undercut, overlap, lack of fusion if open to the surface, and lack of penetration if testing from root side.
- The asset does not require the stringent cleaning needed for Penetrant Testing, as the defect can still be detected if contaminated.
RADIOGRAPHY
Industrial Radiography is a common non-destructive technique that uses ionising radiation to reveal flaws in assets and structures which are otherwise not visible. Industrial Radiography is typically used to detect:
- The presence of material flaws, including cracks, weld defects and voids;
- Loss of material, due to corrosion or erosion, in piping; and,
- The presence of internal blockages, such as in pipework.
Radiography uses a variety of different radioactive sources depending on the requirements of the inspection and the materials being examined. Strict procedures for transportation and handling of the sources are paramount for the safety of operators and the general public.
The ALS Approach
ALS remains an industry leader in the implementation of sophisticated analysis tools and techniques for radiographic imaging and in the use of safe radiation sources. Our capability includes:
- Film Radiography
- Digital Radiography (DR)
- Computed Radiography (CR)
- Real-time Radiography and Movable Radiometry
- Small Controlled Area Radiography (SCAR)
Our investment in this area means that our clients can be confident:
- That high-quality outcomes from radiation work will be produced.
- Their teams can work safely alongside ALS staff whilst Radiography is performed
ROPE ACCESS SERVICES
ALS's Rope Access Services bring cost-saving advantages and enhanced efficiency to accessing remote locations.
Rope access services is ALS’s preferred method for safely and efficiently reaching remote locations. As an alternative to traditional access techniques, such as scaffolding, elevated work platforms (EWPs) and cranes, the time demands of rope access techniques fraction the construction and cost demands of traditional methods without any safety trade-offs.
ALS is a full operational member of International Rope Access Trade Association (IRATA) and therefore operates to the highest global safety standards and best practices for all rope access tasks.
The ALS Approach
Through combining rope access services with our market leading inspection capability, ALS can deliver most services using rope access solutions. This includes:
- Conventional NDT and Advanced NDT including visual inspection;
- On-site Chemical Analysis (OES, PMI);
- Thermography;
- PEC;
- SLOFEC
TUBE INSPECTION
Tube inspections are critical for detecting the common in-service defects of corrosion, erosion, pitting and thinning before they become costly or potentially dangerous threats to asset integrity.
The tube inspection techniques employed by ALS’s trained experts include:
- Conventional Bobbin Eddy Current testin
- Eddy Current array testing
- Remote Field testing
- Near Field testing
- IRIS testing
- Magnetic Bias Eddy Current
- Video inspections
- Ball Micrometers
All the above techniques have application depending on the tube’s material, tube’s dimensions, and the defects that are being specifically monitored for. The defects position, whether internal or external, is another consideration when selecting the inspection method. ALS’ subject matter experts can assist you with identifying the appropriate tube inspection method for your application.
ULTRASONIC TESTING
Ultrasonic testing is a well-established, highly tailorable technology that uses high frequency sound waves to conduct inspections. Methods range from basic manual testing, through to fully automated testing.
Ultrasonic testing has excellent capabilities for determining:
- Component thickness
- Finding and sizing cracking, even in complicated component geometries
- Assessing the extent of corrosion and corrosion loss
- Finding welding, casting and manufacturing defects and assessing the compliance of welds with the applicable standards
ALS' team of subject matter experts can assist in identifying the best approach for your application.
VISUAL INSPECTION
Visual inspection is a basic inspection method, yet it remains a critical step in inspecting the condition of any asset, from equipment to structures.
Visual inspection can be carried out on an array of assets including equipment and structures, which include:
- Tanks
- Pressure vessels
- Piping
In the hands of appropriately skilled inspectors, the benefits of visual inspection will reveal important information and a greater understanding of:
- The presence of significant flaws, including weld defects, cracking and corrosion.
- The compliance of welds and other components with specifications.
- Evidence indicating the reasons why unexpected events such as failures have occurred.
- The condition of the asset and an assessment, where appropriate, of its functionality and remaining life.
At ALS, visual inspection is performed by our qualified materials scientists, tank inspectors (API), welding inspectors, and pressure vessel and classified plant inspectors (AICIP and API) and engineers. Our materials scientists, inspectors and engineers are highly experienced and are equipped with effective visual inspection aids, tools and access solutions to ensure the value of all visual inspections are maximised.
ALS inspection teams utilise RDVI equipment which includes:
- High resolution borescopes.
- Telescopic access poles with high-resolution video cameras attached.
- Crawlers and rovers with the capacity to traverse most terrains.
- Remote Piloted Aircraft/ Drones/ UAV driven by CASA licensed, qualified inspection staff.
- Submersibles or marinized cameras and rovers.
Ads