Application: Measuring the depth of textile and steel reinforcements in rubber conveyor belts, and measuring the remaining rubber thickness of in-service belts during maintenance.
Background: A wide variety of rubber conveyor belts for heavy-duty industrial and mining service such as ore and mineral transportation incorporate internal layers of woven fabric or steel cords for strength reinforcement. Conveyor belt manufacturers need to check the depth of the reinforcement layer across the belt in order to insure that the product meets specification. After installation, belt users need to periodically check the thickness of the remaining rubber as the belt wears down in order to estimate the remaining service life before replacement. Because large belts can be very expensive, accurate information on remaining rubber thickness is valuable to users. Our instruments and transducers have been successfully employed in this test for many years.
Sound energy reflects off the first layer of reinforcement, and in the case of textile or fabric reinforced belts very little sound energy will penetrate deeper. Measurement of total belt thickness is normally possible only in the case of some steel-reinforced belts where there is sufficiently wide separation between the steel cords to permit sound energy to travel unobstructed the opposite side of the belt. However, the critical dimension for most users is the amount of rubber over the first reinforcement layer, not total thickness. This is usually a straightforward application for ultrasonic thickness gaging.
Equipment: Conveyor belt rubber thicknesses under approximately 12.5 mm or 0.50 in. can usually be measured with standard thickness gage models 38DL PLUS and 45MG with Single Element software. For greater thicknesses, the High Penetration software option for these gages will be needed should be used. Thickness measurements can also be made with any of the EPOCH series flaw detectors. In the case of certain very large belts, with rubber thicknesses approaching 50 mm or 2 in., the Epoch series flaw detectors are the preferred instruments.
The transducer selection will depend on the range of rubber thickness to be measured. For rubber layers between approximately 1 mm (0.040 in.) and 6.25 mm (0.250 in.), a 2.25 MHz delay line transducer (M207-RB) will usually be recommended. For measurement of rubber between approximately 2.5 mm (0.100 in.) and 25 mm (1 in.), a 2.25 MHz high penetration contact transducer (M1036) is commonly used. Other transducers are available for thinner and thicker rubber layers.
As with any application involving attenuating materials, use of gel couplant or glycerin (Couplant B) is recommended in preference to less viscous fluids. In the case of severely worn in-service belts, any loose rubber or other debris should be removed from the surface before testing.
Procedure: In the most common situation, using the M1036 transducer to measure the outer rubber layers on belts with textile or fabric reinforcement, start with the gage's M1036 default setup and increase maximum gain as necessary to measure the thickness range of interest. If necessary for measurement of thin belts, increase initial gain as well. In any of these setups, gain may usually be increased up to the point where the gage displays a constant false reading when the transducer is uncoupled, which indicates that gain is too high.
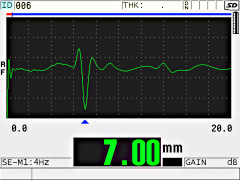
Typical conveyor belt measurement with M1036
To measure thin rubber layers over textile or fabric reinforcement with the M207 delay line transducer, use the M207 Mode 2 default setup and adjust gain and blanking as necessary based on the echoes from a reference standard.
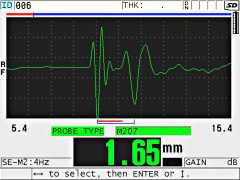
Typical thin rubber layer measurement with M207
Measurement of depth of braided steel cord reinforcements can be more challenging because their irregular contour presents a less optimum reflecting surface. Careful adjustment of instrument gain with the aid of a reference sample is recommended. Also note that echo polarity will be positive rather than negative because the steel represents a high impedance reflector.

Steel cord depth measurement with M1036
Sound velocity in rubber compounds will typically be on the order of 1.650 mm/uS or 0.0650 in/uS. The Olympus Applications Lab is always available to assist with gage setups for specific transducers and belt types.
Products used for this application
EPOCH 650
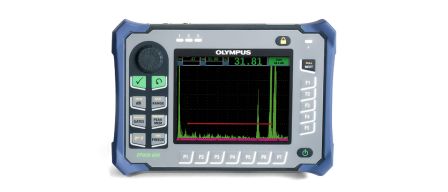
The EPOCH 650 is a conventional ultrasonic flaw detector with excellent inspection performance and usability for a wide variety of applications. This intuitive, rugged instrument is a continuation of the popular EPOCH 600 flaw detector with additional capabilities.
45MG
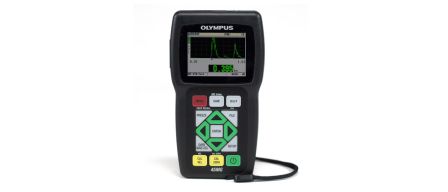
The handheld 45MG ultrasonic thickness gauge is packed with measurement features and software options. This unique instrument is compatible with the complete range of Olympus dual element and single element transducers, making this gauge an all-in-one solution for virtually every thickness gauge application.
38DL PLUS
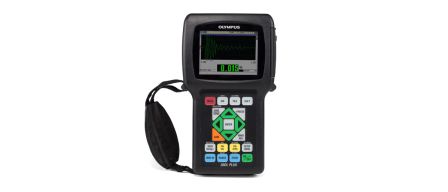
The 38DL PLUS is an advanced ultrasonic thickness gauge. Uses dual element transducer for internal corrosion applications, and has features that include THRU-COAT technology and echo-to-echo. Uses single element transducers for very precise thickness measurements of thin, very thick, or multilayer materials.


