Ultrasonic NDT
Nozzle Integrity Assessment with Volumetric Inspection Solution
Published on 18th July 2020

Source: https://www.eddyfi.com/en/appnote/nozzle-integrity-assessment-with-volumetric-inspection-solution
Nozzles serve a critical function of controlling the rate of flow, speed and the pressure of contents being stored in vessels and tanks among the power generation and petrochemical sectors. Given their crucial role in safeguarding humans and the environment, it is paramount to verify the fitness-for-service of nozzles. Nozzle inspection has traditionally been performed using manual ultrasonic test methods, a time-consuming ordeal given the complex nature and location of the nozzles themselves. While flaw detection has been achievable, locating and sizing defects has proved problematic until recent advancements in phased array ultrasonic testing.
The Challenge
The geometry of saddle surfaces – such as those encountered when inspecting nozzles – makes it extremely difficult for UT inspectors to ensure 100% volumetric inspection and perform a reliable interpretation.
Nozzles are an important class of joints commonly found in pressure containing equipment. Given their complex geometry, nozzles can be very difficult to inspect using ultrasonic techniques. Typical flaws like Lack of Fusion (LOF) are highly sensitive to the beam orientation: the amount of sound pressure the flaw reflects in the direction of the probe depends highly on the orientation of the incident beam. Flaws located close to the top surface often require the sound beams be reflected from the backwall, making it very complicated when trying to inspect nozzles where inside surfaces of the vessel are curved. The inspector must estimate the local cross-section of the nozzle in order to understand the received signal location and indication positions.
The Solution
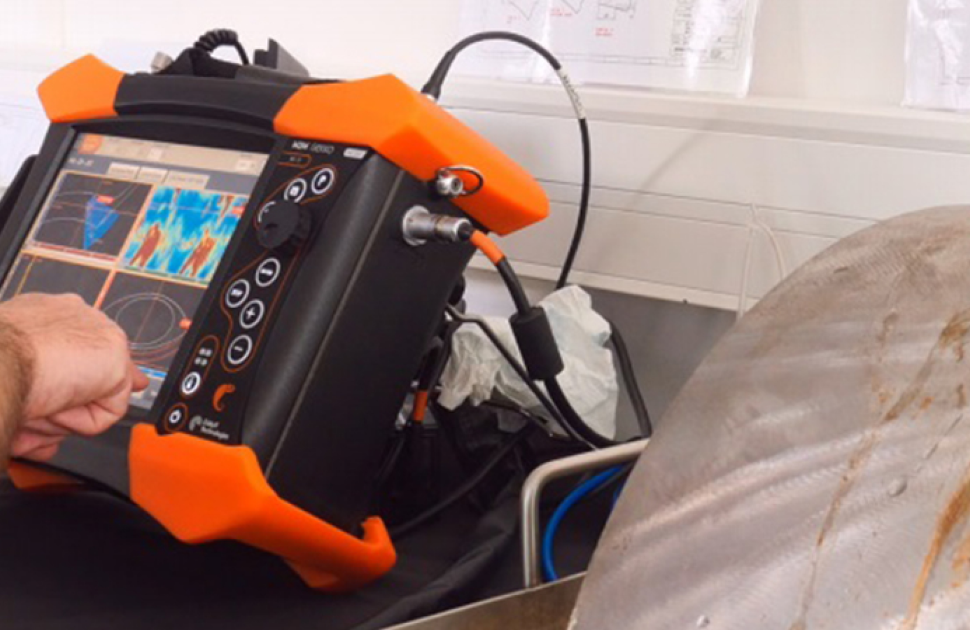
A complete, dedicated application onboard M2M Gekko® for PAUT 3-axis encoded nozzle inspections, allowing easy setup, accurate data collection, and efficient analysis of this complex geometry.
An exclusive application designed specifically for nozzle inspection has been implemented on a portable phased array ultrasonic testing (PAUT) unit, for use with 3-axis encoded nozzle scanners. The scanners facilitate recording the rotational position around the branch (scan axis), linear position along the radial direction of the branch (index axis), and the rotational skew of the probe with respect to the radial direction (skew axis). Using the three encoder positions, cross-section overlays are calculated and superimposed with the ultrasonic data as the inspector moves the probe. This allows the operator to perfectly position the probe and measure the size of indications. Manual inspection of nozzles without the use of scanners is also improved.
The equipment solution consists of:
- The M2M Gekko® or MantisTM system: Efficiently define nozzle geometry through the intuitive application, use a 3-axis encoder nozzle scanner, and it will calculate nozzle cross-section in real time;
- 2- or 3-axis nozzle scanner: Automated or not, this scanner can be used for the main pipe or vessel;
- 1-axis scanner for nozzle side inspection;
- Small footprint linear or matrix array probe.
Eddyfi Technologies presents a unique and advanced solution for the ultrasonic inspection of critical nozzle structures found in power generation, oil, gas and petrochemical industries among others. As technological advances continue, ensuring that nozzles continue to perform to standards is achievable with Gekko and Mantis solutions.
Real-time overlay of the nozzle superimposed to the phased array data
Complete, dedicated application onboard Gekko
Benefits
- Full volumetric inspection
- Improved Probability of Detection (PoD) and characterization accuracy
- Higher productivity
By combining the innovative Gekko and Mantis units with nozzle scanners, Eddyfi Technologies offers the perfect solution for the inspection of carbon and stainless-steel nozzles. Data is encoded along three different axis allowing inspectors to assess nozzles from both the nozzle side and the pipe or vessel side. Displayed in a 3D view, data is easy to interpret. Operators can go further by choosing a matrix array probe for simultaneous inspection of circumferential and radial defects. Real-time overlay of the nozzles superimposed to the phased array data helps quickly identify, locate and size indications efficiently and accurately with the power or recording data along the 3-axis. Along with improved probability of detection and characterization accuracy, improved productivity is an additional benefit with the user-friendly interface that enables fast geometry and scanning setups. Analysis time is greatly reduced thanks to data encoded along 3-axis and the nozzle overlay.


