Eddy Current NDT
Detecting Longitudinal Cracks in Friction-Stir Welds With Eddy Current.
Published on 14th July 2023

Friction-stir welding is a relatively new solid-state joining process (where metal is not melted). This welding technique uses a body tool to join two facing surfaces. Heat is applied to the material, leading to a very soft region near the friction-stir welding tool. The tool spins to mechanically intermix the two facing surfaces. The softened metal is joined using mechanical pressure. The technique is primarily used on aluminum and on structures needing welds with superior strength without post-weld heat treatment. Friction-stir welding is also used in a variety of industries such as shipbuilding, aerospace, automotive, and even personal computers.
The Challenge
Detecting incomplete penetration along the axis of the weld and other defects.
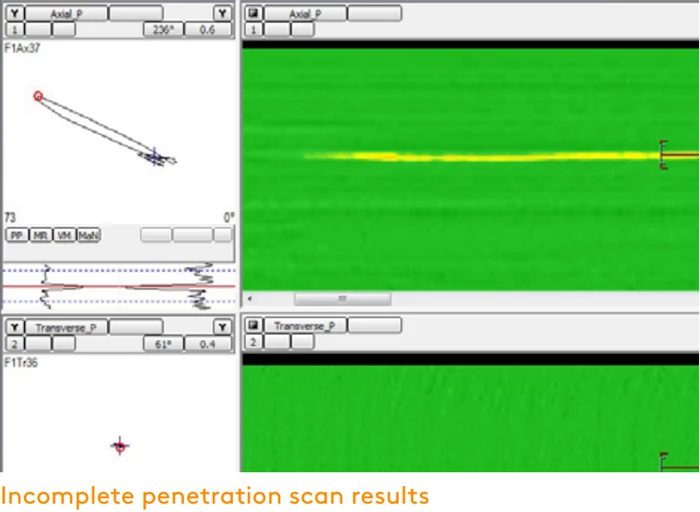
Friction-stir welds (FSW) sometimes suffer from incomplete penetration (IP). IP are axial cracks along the weld seams. IP in this application is 1.5–2 mm (0.06–0.08 in) long, while the FSWs are 9.1 m (30 ft) long.
FSWs are also prone to:
- Short axial and transverse cracking
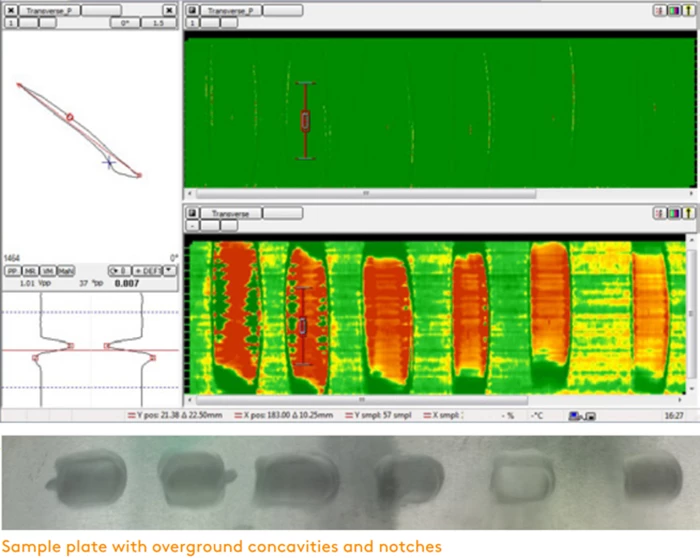
- Axial and transverse cracking in concavities from over-grinding

The FSWs were originally inspected with liquid-penetrant testing (PT for surface-breaking defects) and phased array ultrasonics (PA UT for subsurface defects).
Space was limited and there were obstructions preventing scanning perpendicular to FSWs (in a raster scan; manual or mechanical). None of the companies consulted before Eddyfi Technologies were able to achieve positive results on IP while scanning along the length of the FSW—the weak axis for eddy currents.
With PT, the project required four and a half days to complete.
The Solution
A high-resolution probe with enough ECA channels to reliably detect very small incomplete penetration.
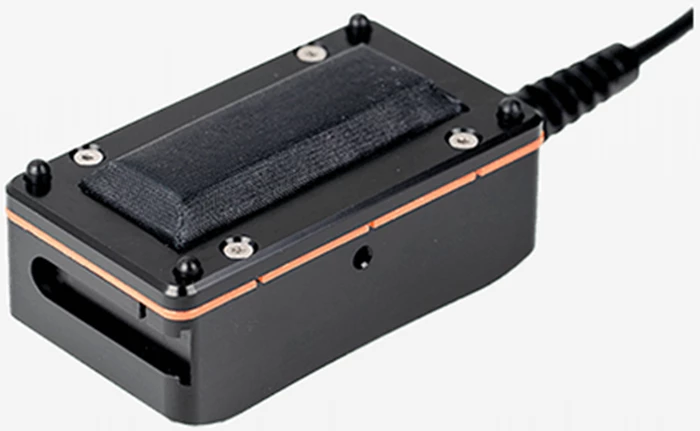
The Eddyfi Technologies solution to this challenge is based on our standard Eddyfi padded surface probe, with some modifications.
The result is a probe composed of six rows of coils, for a total of 126 multiplexed coils on a flexible PCB, yielding close to 128 ECA channels. This configuration gives the probe enough resolution to reliably detect the target's incomplete penetration and other small defects
The probe is also equipped with an encoder for flaw positioning.
This solution takes the four-and-half-day PT inspection down to a fully documented six-hour inspection replacing both PT and PA UT.
The only instrument powerful enough to handle this many multiplexed channels is Ectane.

The Benefits
Significantly faster and more reliable detection than with previous inspection methods, without surface preparation in a single pass.
Using this inspection solution has the following benefits:
Productivity gains
- Inspect FSWs several times faster than with other inspection techniques.
Improved PoD
- ECA enables detecting defects with precision, unlike PT.
Repeatability
- The overall simple operation of the solution ensures repeatability across the entire inspection project.
Better reliability
- Single-pass scanning with intuitive C-scan imaging.
Accountability
- Full data archiving to back up inspection results.
Health and Safety
- ECA, unlike PT, does not need any chemicals, resolving H&S issues.


