Acoustic Emission NDT
Barkhausen Noise on a Failed Gear
Published on 8th April 2021

The problem: Grinding re-temper burn on gear teeth
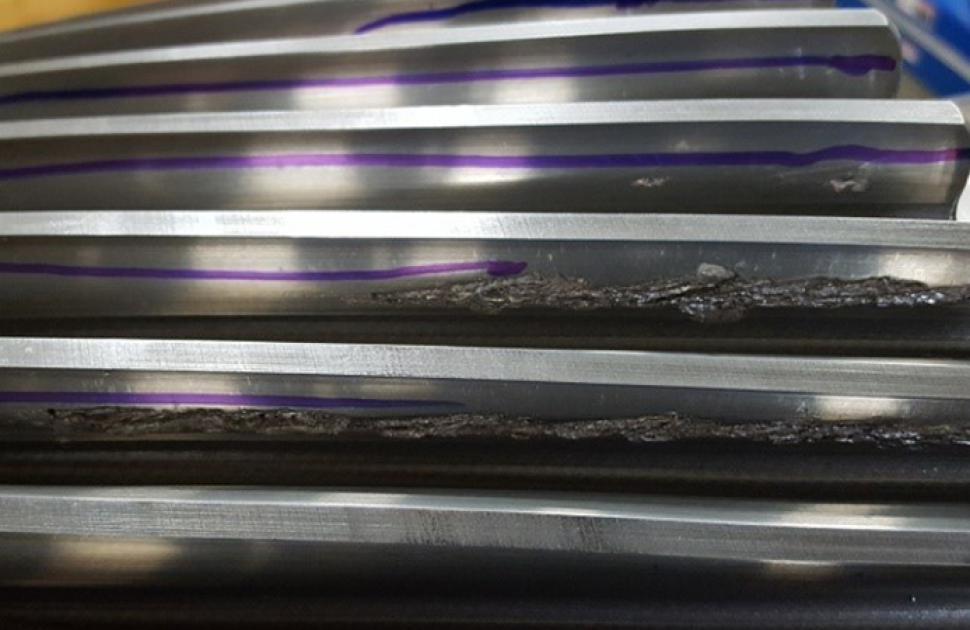
Many manufacturing processes such as machining, cold working, or surface hardening involve some modification of stress and/or microstructure. In this case, a gearbox manufacturer uncovered a failed gear which under visual inspection showed three (3) teeth that were spalled. The cause of the defect was suspected to be grinding re-temper burn.

Figure 1: Failed gear teeth due to grinding burn (temper).
The testing method: Non-destructive Barkhausen noise analysis
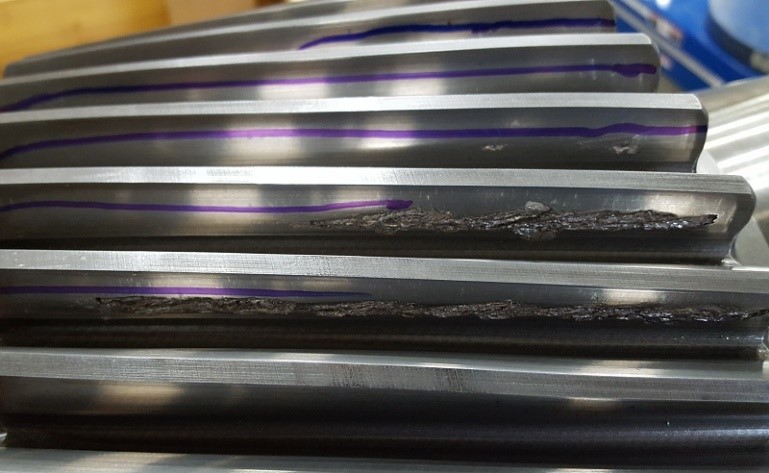
Barkhausen noise analysis, a non-destructive testing method involving the measurement of a noise-like signal in ferromagnetic materials, was used the test the gear teeth. The testing was performed by hand by scanning with a sensor designed for gear flank testing. Five scans were performed on the flanks of each tooth at the top (near the tip of the tooth), at the top-middle, the middle, the mid-bottom, and at the bottom of the tooth near the root.

Figure 2: Barkhausen scans completed on each tooth.
Once the scanning was complete, the entire gear was analyzed for inconsistencies based on the visual indications. Each tooth was also mapped in order to identify localized indications.
The results
Figure 3 shows the statistical results from scans performed on the middle diameter of each of the 43 teeth. It is very easy to see that teeth 1 through 34 are very consistent in Barkhausen response.

Figure 3: BN Scan Max, Avg, Min (@ Middle) vs Tooth Number
Teeth 39, 40, and 41 showed visible signs of damage, as shown in Figure 1. However, the Barkhausen noise results showed that there was metallurgical and/or stress damage in teeth 35-38 as well.
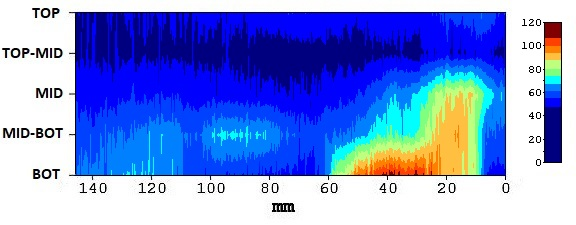
A closer look at the Barkhausen data collected from tooth 37 (below) shows a localized area of increased Barkhausen noise response. This is a clear indication of grinding re-temper burn which would have gone undetected utilizing the customers current inspection techniques. For future inspections, Barkhausen Noise was utilized to check for the presence of grinding re-temper burn on all finished products.

Figure 4: 2D map of BN response for tooth 37
Instrument used for this application:
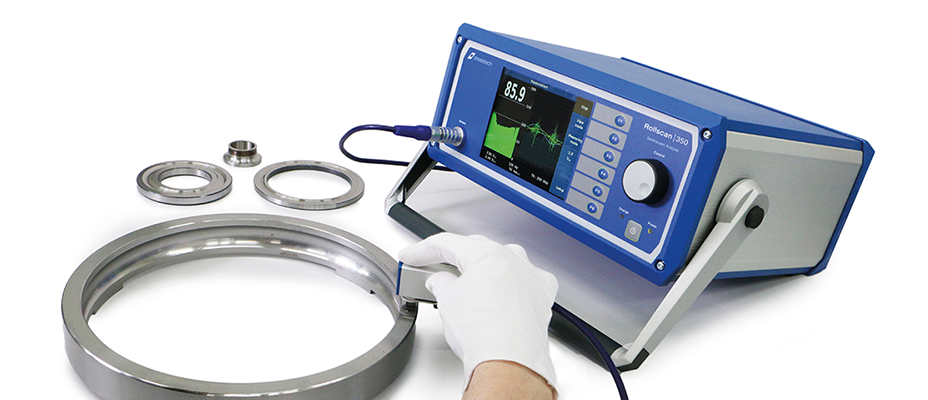
Barkhausen noise signal analyzer Rollscan 350 is designed for surface quality control and testing of near-surface defects such as grinding burns, heat treatment defects, as well as changes in stress and microstructure in a wide variety of ferritic steel and other ferromagnetic materials.

Source: https://www.stresstech.com/application-note-barkhausen-noise-on-a-failed-gear/


