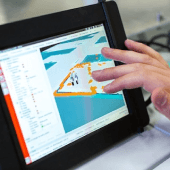
C-scan mapping is the best ultrasonic testing method to rapidly inspect large surfaces.
Ultrasonic NDT technology can acoustically examine material and create complete inspection maps. The process is called C-scan mapping. Illustrated by comprehensive colour palettes, these volumetric integrity reports are as easy to interpret as a traditional X-Ray.
Basics of C-scan mapping
Ultrasonic flaw detectors record complete A-scan information and can use it to create a two-dimensional C-scan map. Using a gate within the A-scan, each pixel of a C-scan map depicts the depth (time-of-flight) or amplitude of the echoes crossing that gate. Using vivid colour palettes to represent % or mm values, it is then possible to rapidly analyse the complete volumetric integrity of the part.
Linear Array Technology is particularly efficient when performing high-resolution C-scan mapping and inspecting large surface areas. The technique is useful for assessing composite parts or to assess the thickness or level of corrosion on a metallic slab/sheet.
Amplitude or Depth Method?
As we can see below, the depth and amplitude-based C-Scan may reveal complementary information and both mapping methods have advantages and must be well understood to properly support the NDT professional in his task.
Amplitude C-scan is generally used to monitor the behaviour of a specific section of the part. Monitoring the backwall (BW) amplitude can give information on the presence of small mid-wall porosities (BW drops). On the other hand, monitoring a specific composite section can help to spot weak bonding (BW peaks) from the adhesive process between two composite layers.
Depth C-scan is generally used to monitor the thickness of a part by giving information on the remaining wall thickness or by precisely positioning an anomaly like a disbond, a large porosity or a flaw within the material.
With the use of an advanced ultrasonic flaw detector, like the Sonatest RSflite, Veo+ or Prisma, it is possible to record complete high-quality A-scan information and as a result, within a single scan (data set), both amplitude and depth C-scan mapping information can be generated. This saves significant scanning time for the technician as there is no need to scan the part twice to make a complete analysis using both modes.
Data Analysis Step
Once the acquisition is made, and the proper analysis mode has been chosen, the data analysis step is often considered laborious because of the interpretation of the data and report writing. Fortunately, there are solutions like the Sonatest UTmap software that are designed and developed to simplify the examination process.
Data alignment and overlapping
A C-scan map is generally made up of many strips. Before proceeding to analyse the data, it is important to make sure that all of the strips are properly aligned and that any overlap between strips has been accounted for. These adjustments are necessary but can be very time consuming. However, Sonatest UTmap offers the possibility to create a T-scan (Tiled Scan) where every strip can be individually rotated, translated and overlapped to easily form the correct arrangement. Once assembled, the T-Scan represents a meaningful image for analysis and reporting.
To improve data alignment precision, UTmap also offers the unique possibility to import 2D CAD drawings of the part (or a simple picture) in the T-scan workspace. The C-scan strips can then be precisely applied with opacity option on the CAD overlay to create even more comprehensive inspection reports.
Software Gain and Re-Gating Adjustment
Compared to other software solutions, UTmap allows post-acquisition C-scan re-gating and sensitivity adjustment of each strip of data. This granular software adjustment feature is especially useful to deal with thickness changes and more importantly when dealing with amplitude assessment-based C-scan mapping. Indeed, this mode is more sensitive to coupling or pressure variations that it is unfortunately often difficult to avoid during the acquisition step.
Real-Time Automatic Measurements
When all the strips are aligned, and the gates and gain sensitivity have been harmonised, the real-time automatic annotation feature is a key tool to expedite the analysis and reporting process. When activated, the annotation box automatically contours with a specific colour code discontinuity based on a selectable amplitude criteria, depth criteria or both at the same time. These measurements are performed in real-time wherever the box is positioned in the T-scan.
The benefits of this automatic annotation box are dimension precision improvement, repeatability as well as a fast and reliable process.
C-scan Mapping Reporting
In a single step, a report summarises the inspection. Thus, the defect (or the absence of defects) in the parts is highlighted with images as well as the basic inspection data: ultrasound device, probe, materials and thickness. The automated report is available in PDF format, saves time and increases overall productivity.
For the more advanced users, the UTmap software offers the possibility to export the results of the C-scan mapping information into a CSV format. This is especially useful for end-users who want to analyse in depth with advanced algorithms.
Source: https://sonatest.com/resources/educational-notes/how-analyse-c-scan-mapping


